
How to setup PPTP VPN on MacOS X:
Important note: Name of VPN connection and username are given just for example. Use your own account details.To Start
1. Click the apple logo, and select System Preferences

2. Click on the Network icon under Internet & Network

3. If you see a locked padlock in the bottom left, click on it. Otherwise skip to step 5.

4. Enter your password in the dialog box
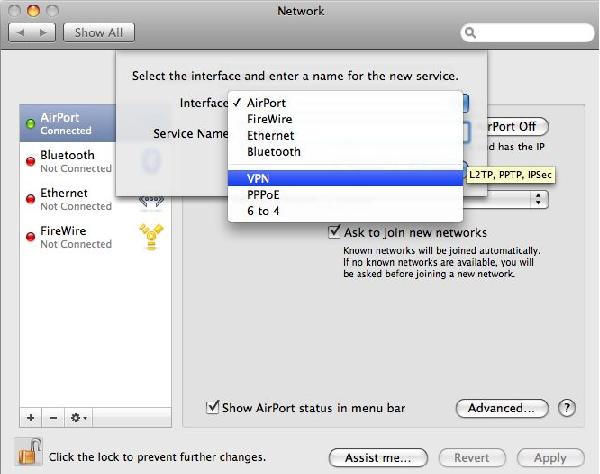
5. Click on the little + icon just above the padlock

6. Select VPN From the interface drop down.
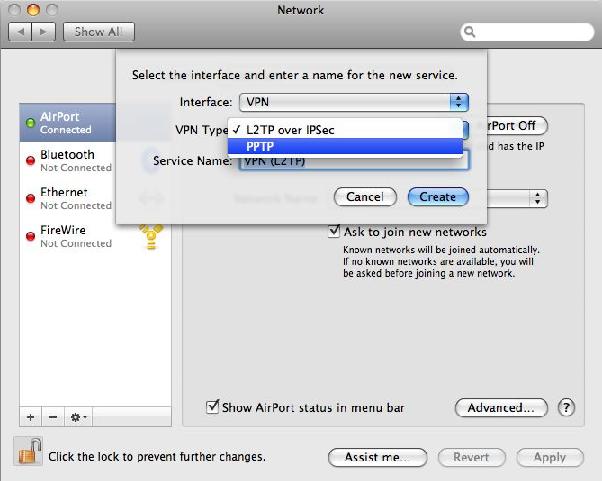
7. Select PPTP From the VPN Type drop down
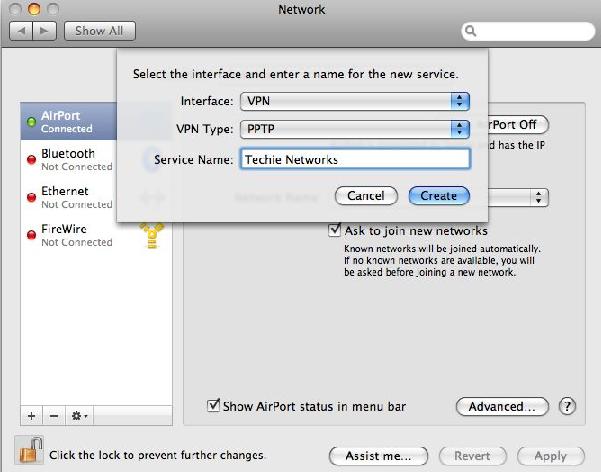
8. Enter the name of the company you are connecting to, and click Create
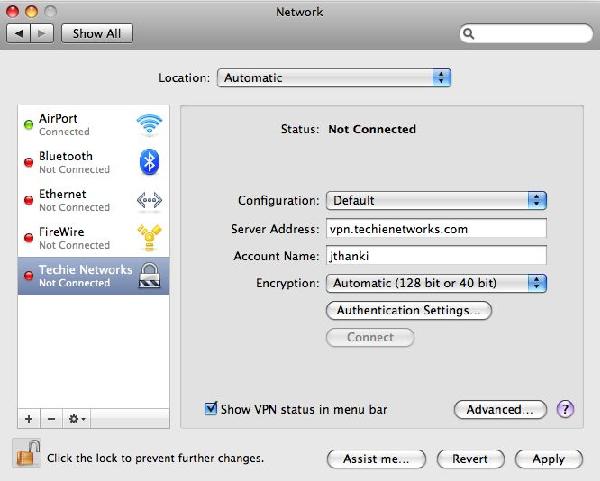
9. Enter the Server Address that your system administrator has provided to you, and your username.
Server address must be exactly as in your account data (without http://, www or any other symbols).
Also check the box that says Show VPN status in menu bar

10. Click on the Authentication Settings button, and enter your password

11. Click Advanced button and tick 'Send all traffic over VPN connection'.

12. Almost done. Click the Apply button to save the changes.
13. In the top right of your screen, click the token icon that looks like this. From that, a menu will drop down. Click on the Connect link for your company name. This will initiate the VPN connection.

14. If all is well, after a few seconds you will be connected, and a timer will start showing you how long you have been connected

15. Open "System Preferences" by going to Apple > System Preferences.
Select the Network icon in the "System Preferences" window.
Choose VPN connection that you have created previously.
Click the Advanced button.
Select Options and tick "Send all traffic over VPN connection".
 USA (San Jose, CA)
 Canada (Montreal,Quebec)
 Luxembourg (Europe)


